
Help
Billing
Subscriptions, Plans and Invoices
This guide covers how to manage your school’s billing features, including subscriptions, plans, and invoices.
Accessing Billing Features
Navigate to billing by clicking School in the main navigation, then selecting Billing.
Here, you’ll see tabs for Payments, Invoices, Subscriptions, Plans, and Account Details.
Creating and Managing Plans
Plans are templates for subscriptions that define pricing and billing frequency.
To create a plan:- Navigate to Billing > Plans
- Click Add Plan
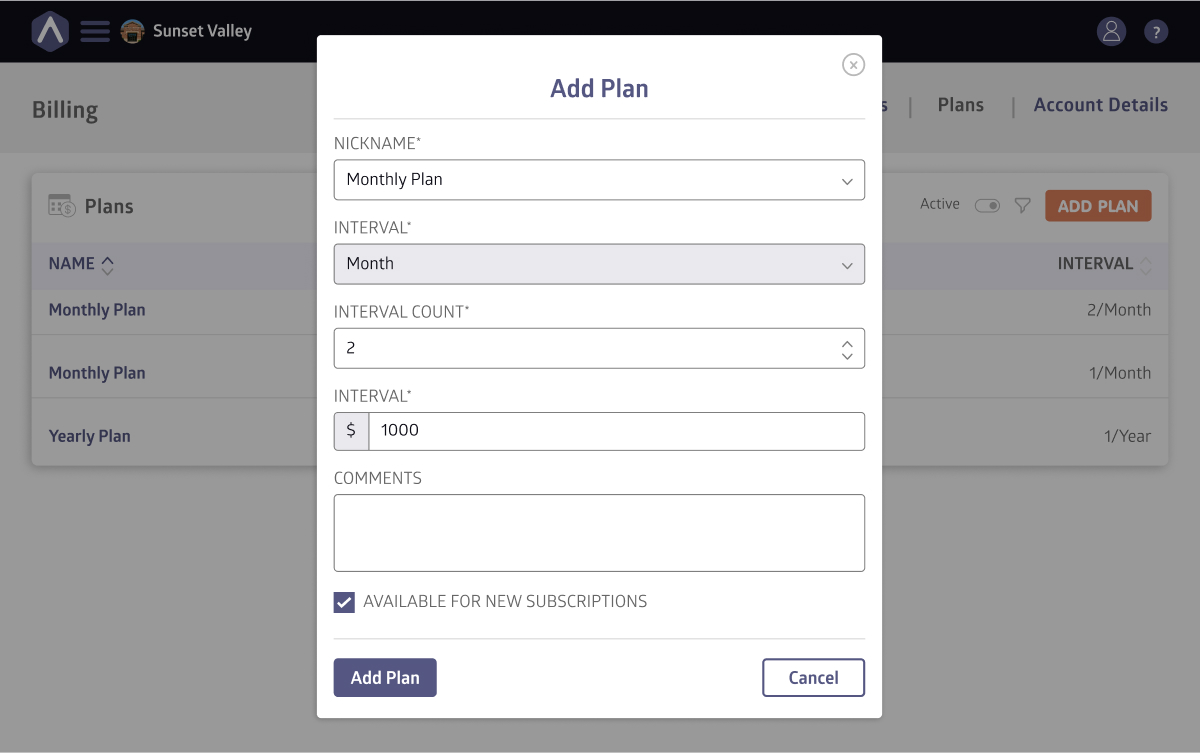
- Enter the plan details:
- Name (e.g., “Monthly Tuition – Grade 1”)
- Interval (Weekly, Monthly, Yearly, or Custom)
- Interval count (e.g., “1” for every month, “2” for every two months)
- Amount
- Once you’re happy with your selection, click Add Plan
Plans can be set as Active (available for new subscriptions) or Inactive (hidden, but existing subscriptions continue).
Creating Subscriptions
Once you’ve set up a plan, you can create a subscription and assign it to a student.
Here’s how to do it:
- Navigate to Billing > Subscriptions
- Click Add Subscription
- Select the appropriate plan from the dropdown menu
- Search for the student you would like to assign the subscription to, and click Continue
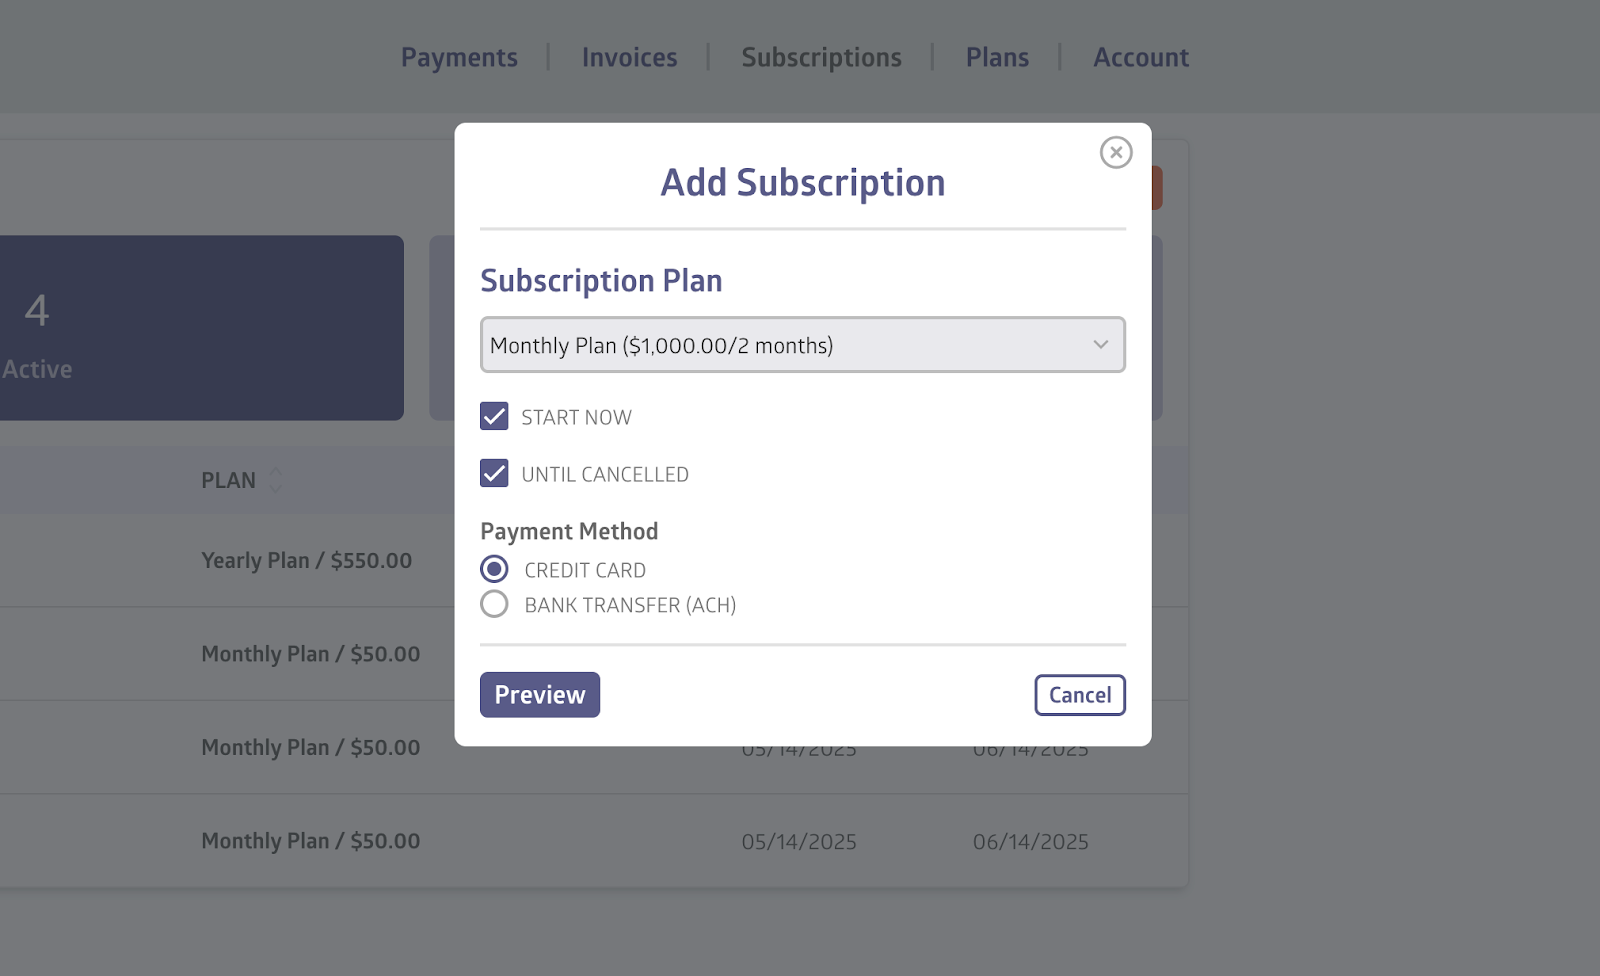
- Choose when the subscription should begin (Start Now) and whether it should run Until Cancelled
- Select a payment method: Credit Card or Bank Transfer (ACH), then click Preview
- Review the subscription details and click Yes, Add Subscription
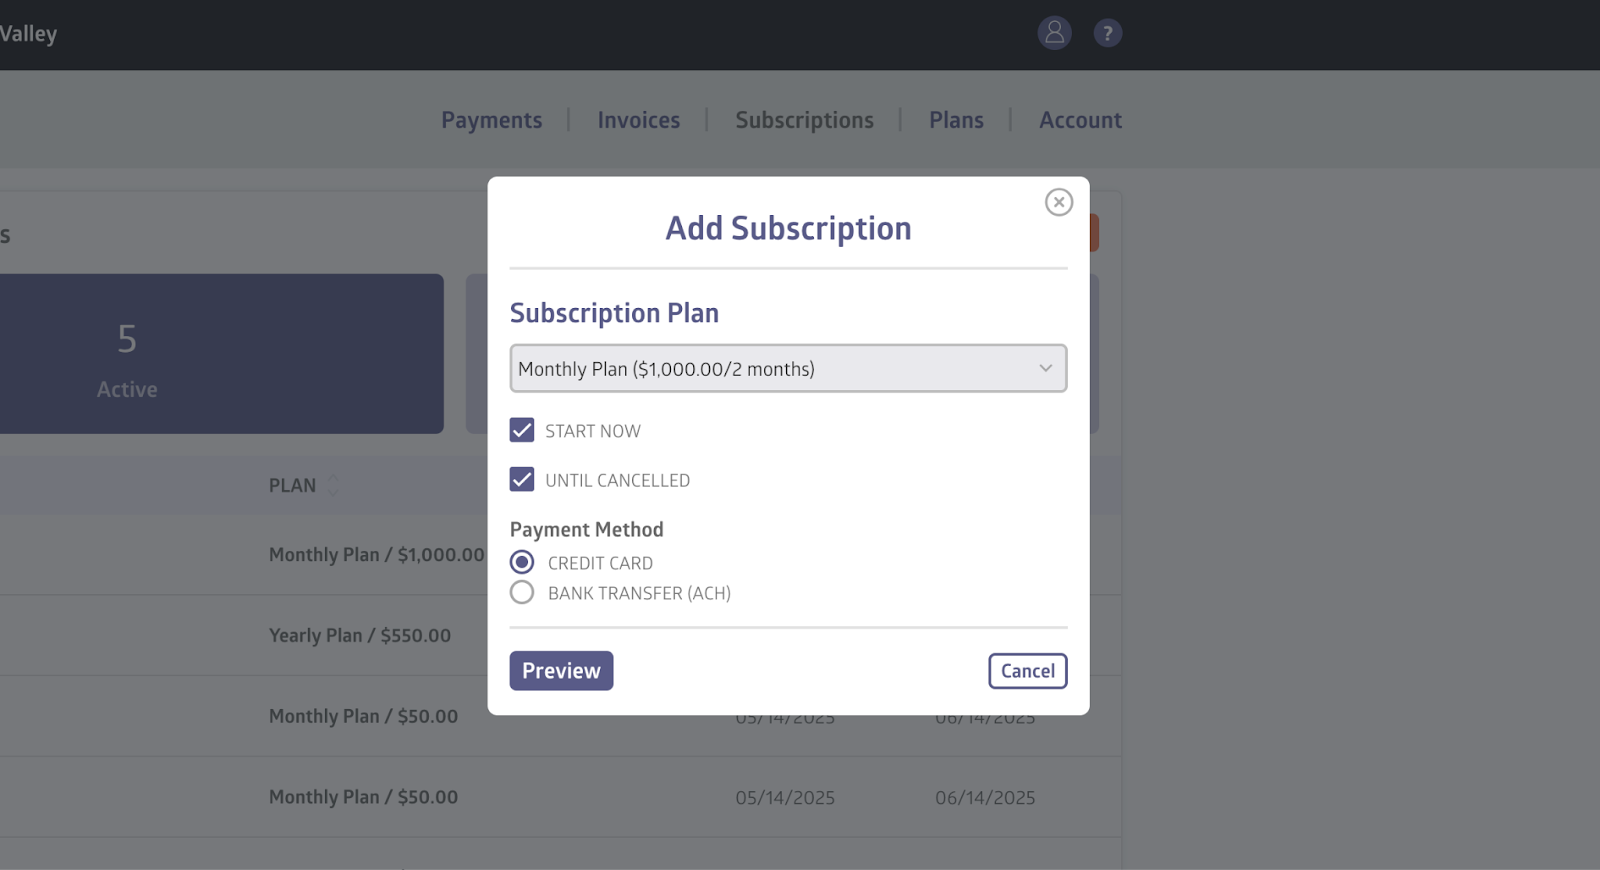
After checkout, the subscription appears as active on the Subscriptions page.
You can see all of your active and cancelled subscriptions at a glance at the top of the page.
These metrics help you monitor your recurring revenue and retention at a glance.
You can also manage and edit an active subscription by clicking on it.
Editing a Subscription
You can update the price of an active subscription directly from the subscription detail page. Please note that this feature is not available for ACH subscriptions with automatic debit.
From the Subscriptions list, click on any active subscription to view its details, then click Edit.
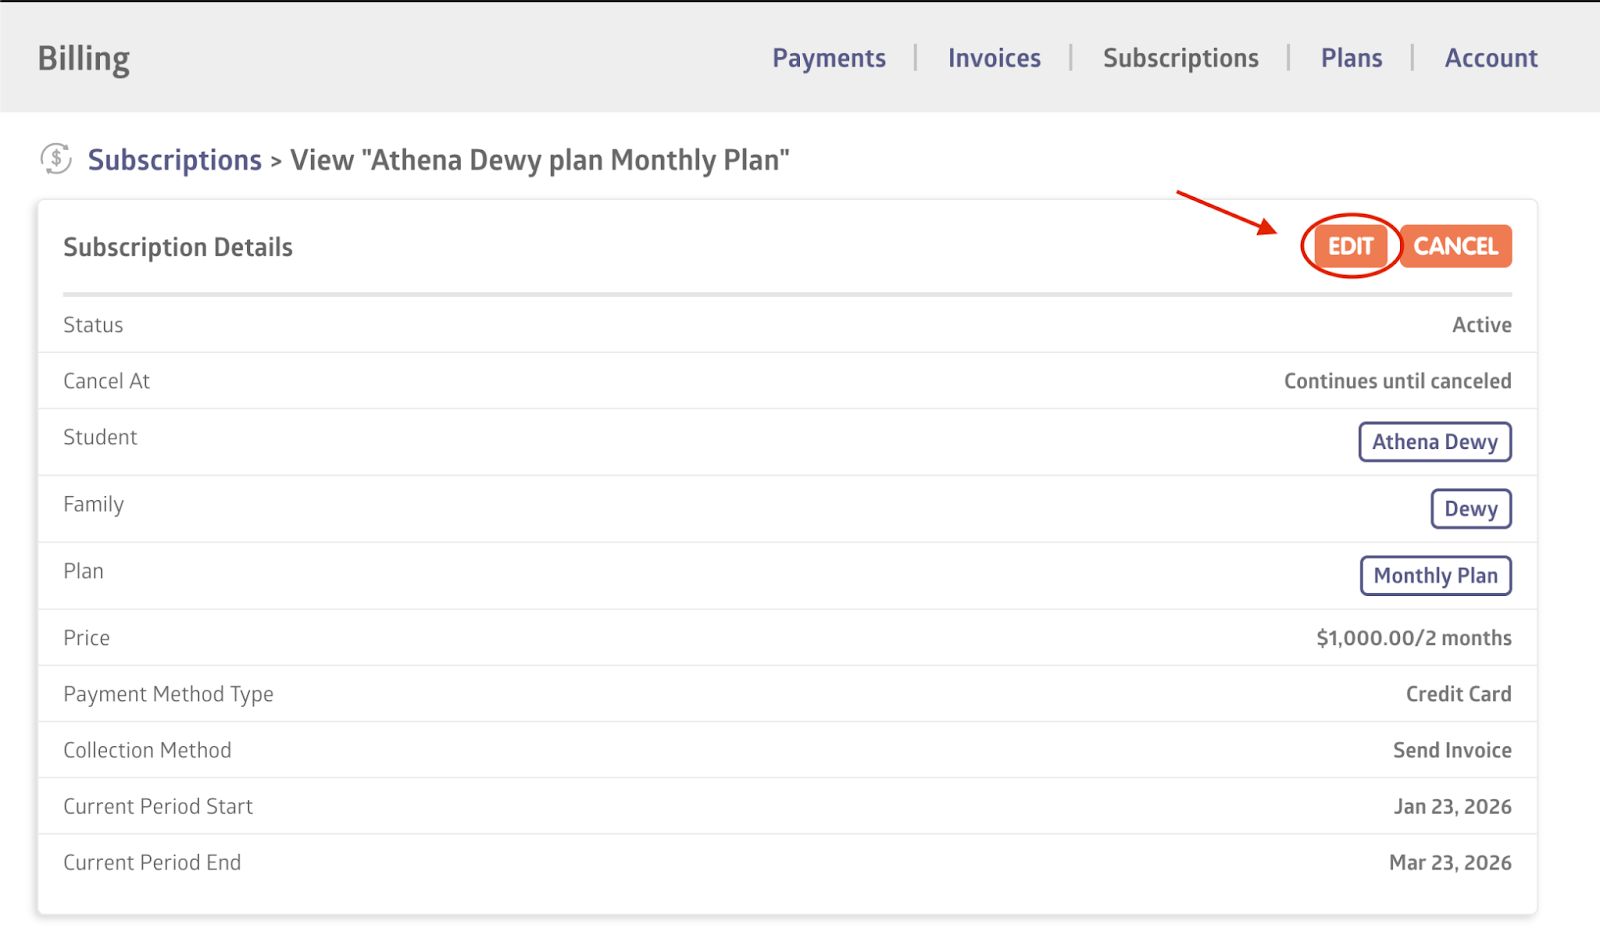
Enter the new price, preview the changes, and confirm.
The new price will automatically take effect starting with the next billing cycle.
Viewing Subscription Activity Logs
Every subscription includes an activity log that records important events, such as when the subscription was created, updated, or canceled.
You’ll find this log in the Activity section of the subscription details page. This provides a clear history of changes, helping you keep track of updates over time.
Scheduled Subscriptions
Scheduled Subscriptions let you start billing on a future date and optionally limit the number of billing cycles. This helps schools align payments with academic calendars, terms, or enrollment windows.
How to Create a Scheduled Subscription
- Head to Billing, Subscriptions
- Click Add Subscription
- Search for and select the student, then choose a plan
- To set a future start date: uncheck Start Now and select your preferred date
- To limit the length: uncheck Until Cancelled and enter the number of cycles (e.g., “4” for four months)
- Click Preview to see the calculated start and end dates
- Review the details and click Yes, Add Subscription
If you keep Start Now and Until Cancelled checked, the subscription begins immediately and continues until it is manually cancelled.
If you instead set a future start date or specify a number of cycles, the system creates a subscription schedule, which will start automatically on the chosen date and end after the defined cycles.
Managing Scheduled Subscriptions
To manage your scheduled subscriptions:
- Go to your Subscriptions list
- Use the Active/Inactive toggle to switch between views if needed
- Click the subscription you want to manage. This opens the Subscription Details page
- If the subscription is Not Started or Active, you can click Cancel to end the schedule
Working With Invoices
Once a subscription is allocated to a student, an invoice is automatically created, finalized, and emailed to the family with payment links.
You can see everything related to invoices by heading to Billing > Invoices.
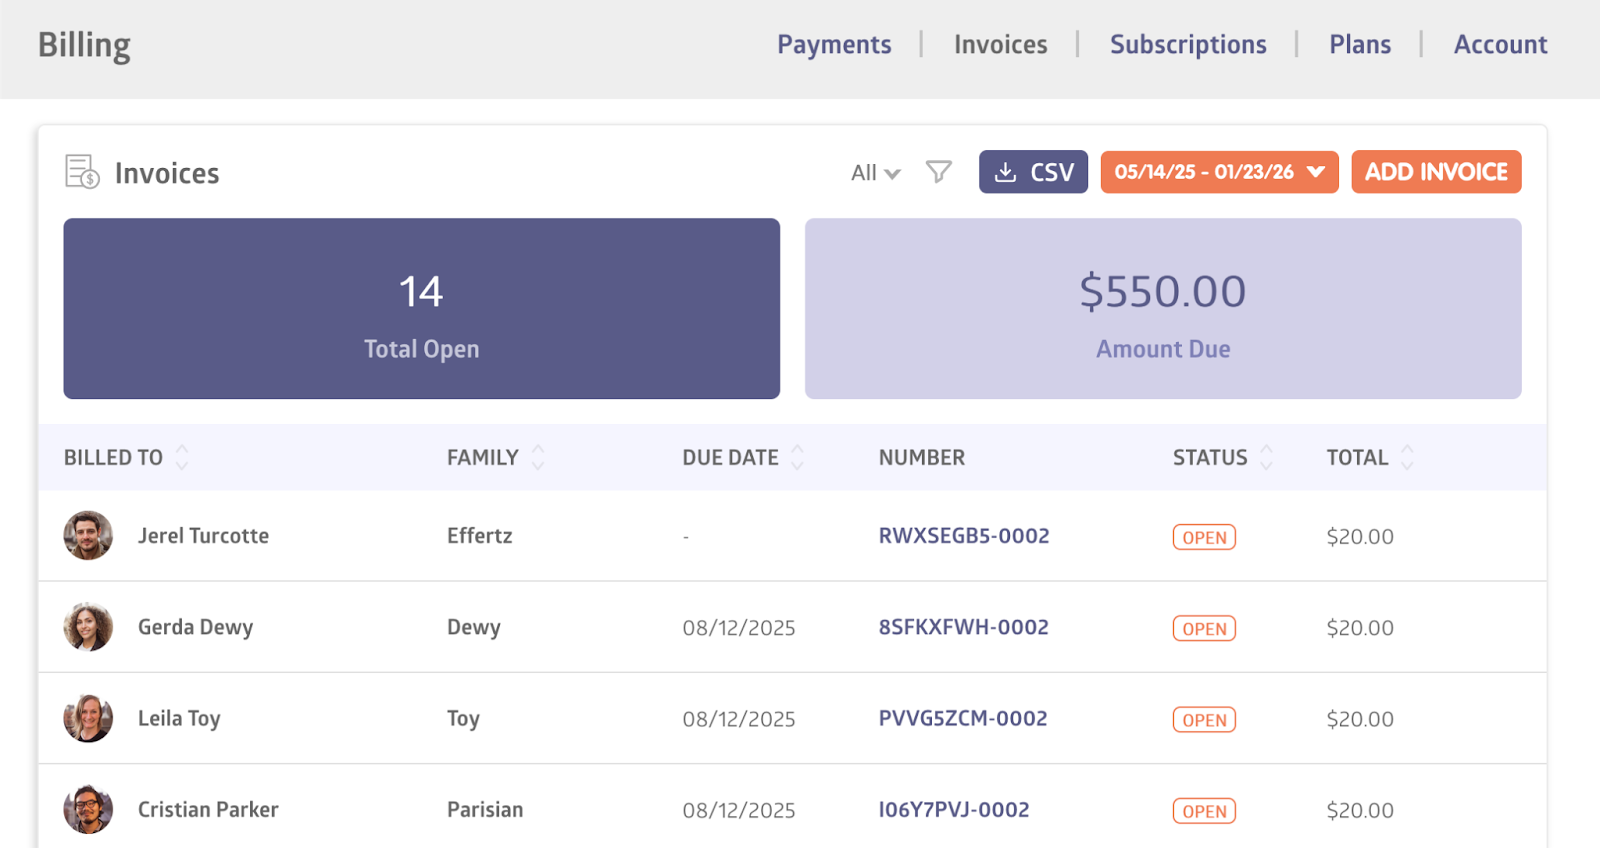
At the top of the Invoices page, two summary cards provide quick insights:
- Total Open: Number of invoices awaiting payment
- Amount Due: Combined dollar amount of all open invoices
Filtering Invoices by Date
Use the date range filter to view invoices from specific periods:
- Click the orange Date Range button in the top right
- Select your start and end dates from the calendar
- The invoice list updates to show only invoices from that period
Exporting Invoice Data
Click the CSV button next to the date filter to export the current invoice list to a spreadsheet. The export includes all invoices shown after any filters are applied.
Still stuck? Shoot us an email and we’ll do our best to help.