
Help
School
Enrollment Forms
Enrollment forms help schools streamline registration by collecting the necessary student and guardian information while optionally including predefined subscription plans and registration fees. These forms ensure that all required data is collected upfront while allowing flexibility in how each school manages enrollment workflows.
Once published, enrollment forms generate a custom URL to share with applicants. Schools can then review, approve, or reject submissions all from one place.
Creating an Enrollment Form
You can create an enrollment form directly from your Forms dashboard. Here’s how to get started:
- Head to your School page and click Forms in the top navigation
- Click Add Form
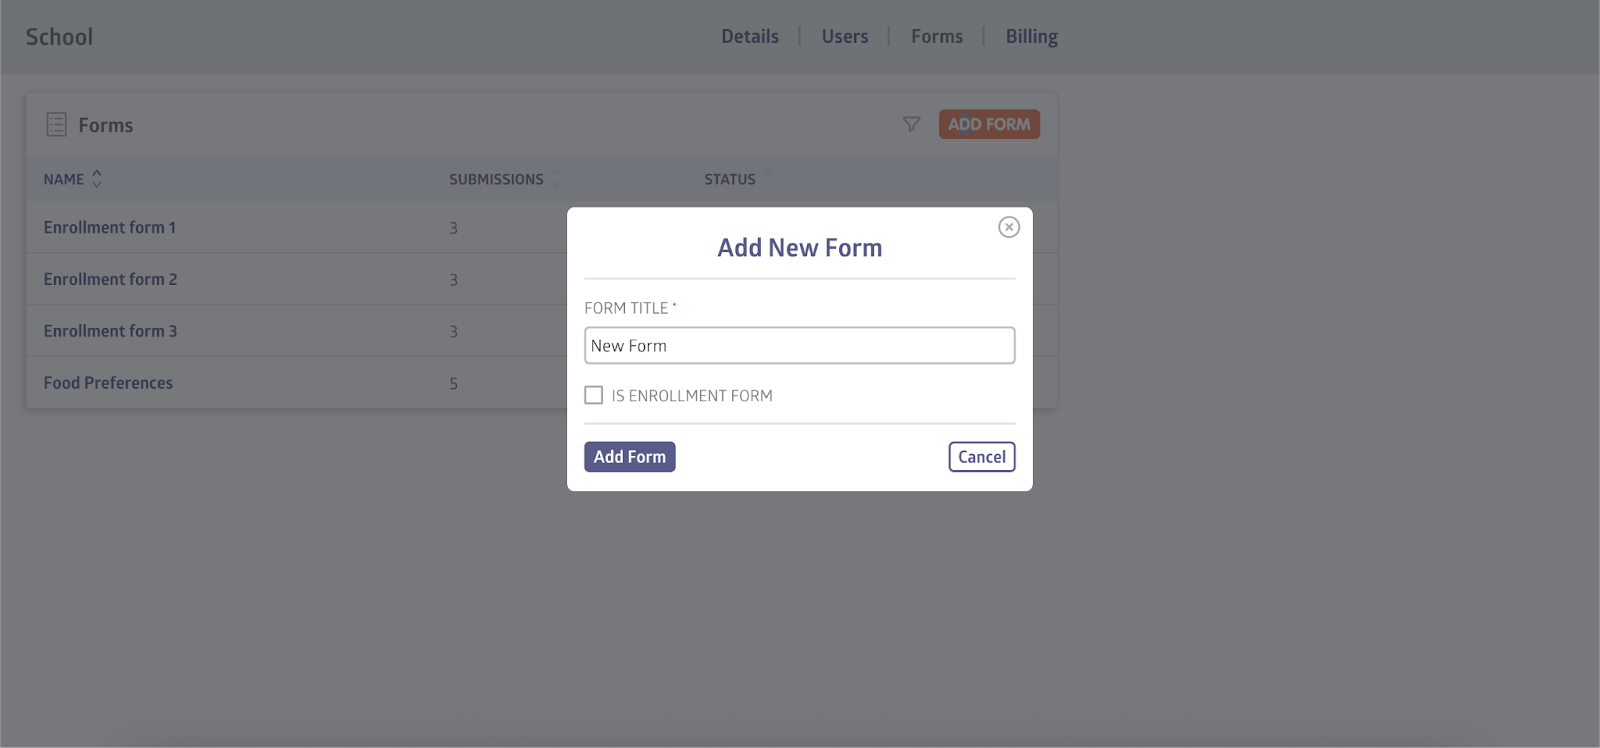
- Next, check the box labeled “Is an enrollment form”
- The form title will be pre-filled, and you’ll see new enrollment-specific settings appear
Set Enrollment Options
You can define key enrollment details that apply to every submission made through this form:
- Subscription Plan: Select an existing subscription plan or create a new one. During registration, you can customize how the plan name appears to users.
- Registration Fee (Optional): Set a one-time fee (e.g., $20) and include a description (e.g., “Non-refundable processing fee”).
If you predefine a plan or registration fee in the form setup, those values will be locked and displayed to applicants during enrollment. They cannot be changed later.
If you leave them blank, you can define them for each submission after it has been received. This flexibility allows schools to tailor fees or plans per applicant when needed.
Once an applicant sees a predefined plan or fee, it cannot be changed without rejecting the submission and asking the applicant to start over.
Add Required and Custom Fields
Enrollment forms come with built-in fields to collect:
- Student information
- Guardian details
You can also add dedicated field types for both students and guardians, such as profile pictures, access to emails, phone numbers, and addresses.
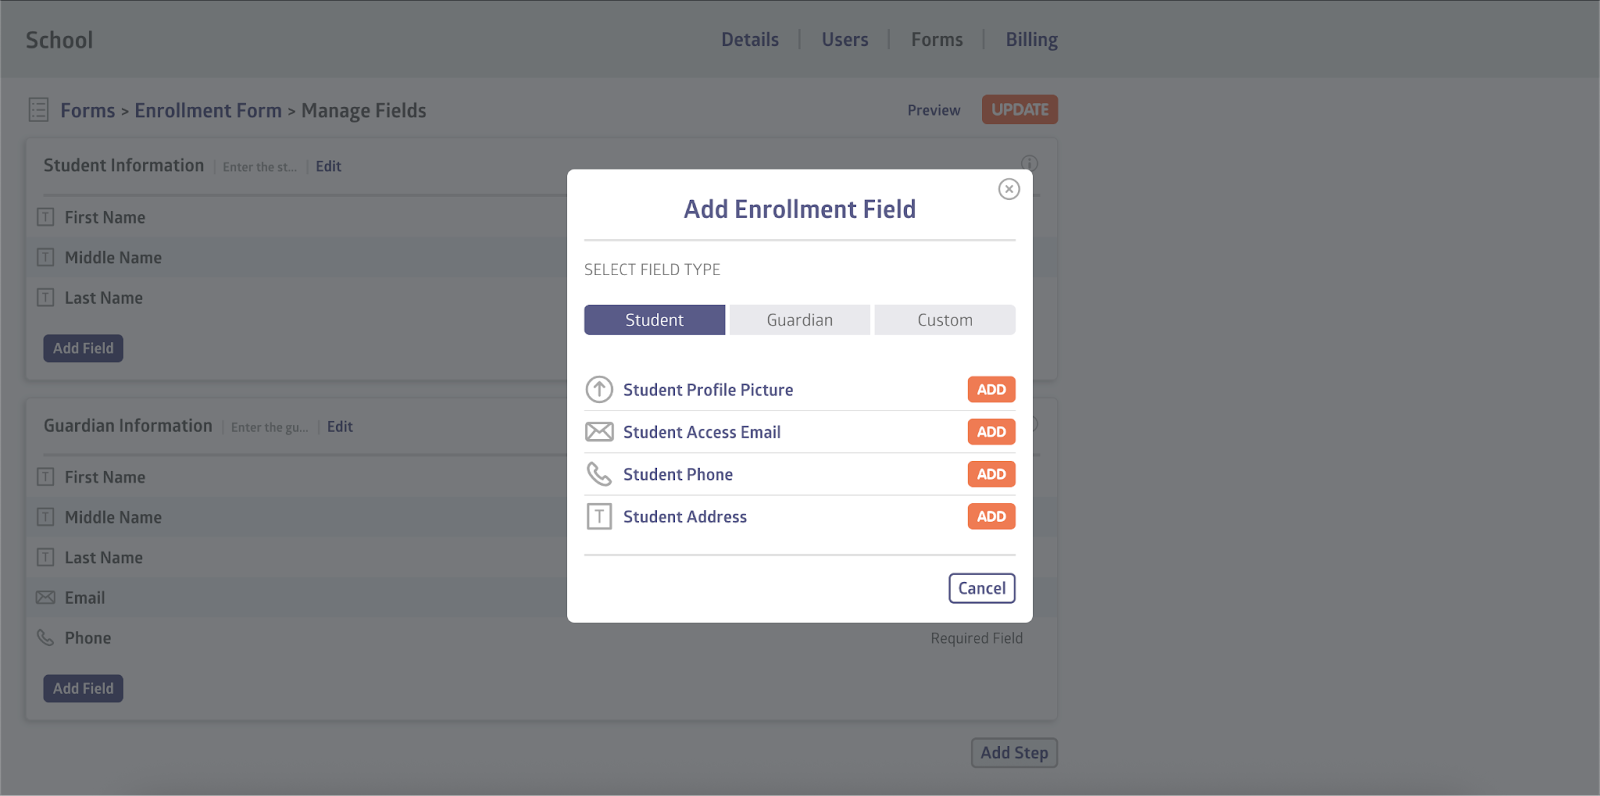
These fields automatically assign data to the student’s or guardian’s profile, so schools don’t need to manage it manually. Each profile field can only be added once; however, custom fields are still available for collecting additional data.
These system-required fields and step names cannot be edited or removed. However, you can add additional fields to capture extra information:
- File Uploads (e.g., student photo)
- Custom questions or data points
When you’re ready, click Publish. The system will generate a custom enrollment form link that you can share with applicants.
Checkbox Attachments
When adding a checkbox field, schools can attach a file that users must review (e.g., a waiver or terms of use). The file appears directly beneath the checkbox, allowing users to view the document and confirm agreement.
File Upload with Download
The file upload field also supports attachments that users must download, fill out, and re-upload.
This is ideal for collecting signed documents or forms during registration.
Student Experience
When a user accesses your enrollment form, they’ll complete a multi-step flow that includes:
- Required student and guardian info
- Agreement to Stripe’s terms of service
- A Payment Information step (shown even if no fee is predefined)
- A Review Page summarizing all information, including the total amount due
No payments are processed until the school has reviewed and approved the registration.
Once submitted, users will see a confirmation screen. They’ll be contacted after the application has been reviewed.
Reviewing Enrollment Submissions
To view and manage incoming submissions:
- Head to the Forms page
- Select your enrollment form
- Click Registrations on the right-hand side
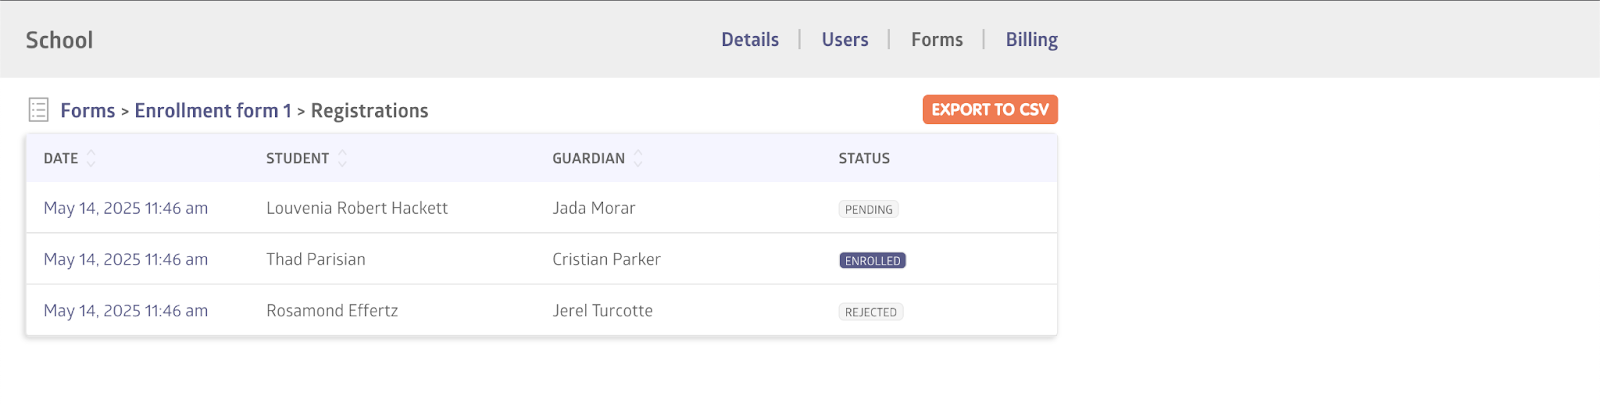
You’ll see a list of all submitted registrations with:
- Submission date
- Student and guardian names
- Registration status (e.g., Pending or Enrolled)
Click a submission to view full details, including:
- All submitted fields
- Payment information
- Plan and fee details (if applicable)
If needed, you can update the payment method or export your registration data as a CSV file.
Editing Plan and Fee on a Submission
If no plan or registration fee was set when the form was created, you’ll be able to define those values on a submission-by-submission basis:
- Click a registration
- Use the Change Plan and Change Fee buttons to assign values
You can also choose to leave the fee empty or assign different plans to different students
Once set, these values will be included during the enrollment confirmation step. If no fee is added, that section will be omitted from the payment summary.
If a plan or fee is predefined and shown to the user during signup, those fields will be locked. To change them, you’ll need to reject the registration and ask the applicant to submit a new form with updated settings.
Approving or Rejecting Registrations
Once a submission has been reviewed, you can choose to reject or enroll the applicant.
Enrolling a Student
Click Enroll and review the enrollment summary. You’ll see a confirmation message noting that this action will:
- Create accounts for the student and guardian
- Enroll the student in the selected plan
- Process the registration fee (if set)
- Set up recurring billing using the saved payment method
- Click Confirm to complete the process.
Once enrolled, you’ll see options to:
- Send login instructions— this sends an email to the guardian with access details for both their own account and the student’s account.
- View student and guardian profiles
- View subscription and invoice details
- The registration status will update to Enrolled, and you can return to the enrollment record at any time.
Still stuck? Shoot us an email and we’ll do our best to help.